Welcome to Building Plastics Online your No.1 Choice for High Quality Building Plastics in the UK
Any orders placed now will be processed on 05th January (due to the festive holiday closure)


- MENU
-
Fascia & Soffit
-
- FASCIA BOARD
- White Fascia Board - Smooth
- White UPVC Fascia Board - Grained
- Black Ash Fascia Board - Grained
- Black UPVC Fascia Board - Smooth
- Agate Grey Fascia Board - Grained
- Anthracite Fascia Board - Grained
- Anthracite UPVC Fascia Board - Smooth
- Dark Grey UPVC Fascia Board - Smooth
- Slate Grey UPVC Fascia Board - Smooth
- Rosewood Fascia Board - Grained
- Golden Oak Fascia Board - Grained
- Irish Oak UPVC Fascia Board - Grained
- Chartwell Green Fascia Board - Grained
- Rustic Green UPVC Fascia Board - Grained
- Cream UPVC Fascia Board - Grained
- Royal Blue UPVC Fascia Board - Grained
- Red UPVC Fascia Board - Grained
- UPVC SOFFIT BOARD
- White Soffit Board - Smooth
- White UPVC Soffit Board - Grained
- Black Ash Soffit Board - Grained
- Black UPVC Soffit Board - Smooth
- Agate Grey Soffit Board - Grained
- Anthracite Soffit Board - Grained
- Anthracite UPVC Soffit Board - Smooth
- Dark Grey UPVC Soffit Board - Smooth
- Slate Grey UPVC Soffit Board - Smooth
- Rosewood Soffit Board - Grained
- Golden Oak Soffit Board - Grained
- Irish Oak UPVC Soffit Board - Grained
- Chartwell Green Soffit Board - Grained
- Rustic Green UPVC Soffit Board - Grained
- Cream UPVC Soffit Board - Grained
- Royal Blue UPVC Soffit Board - Grained
- Red UPVC Soffit Board - Grained
-
-
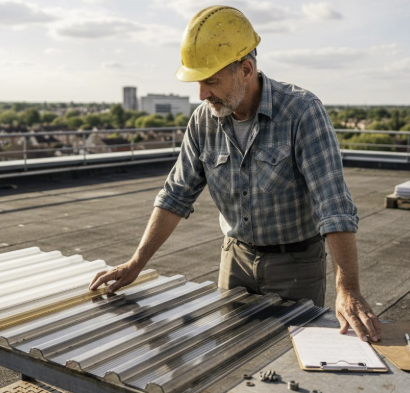
Roofing Sheets
-
- ROOFING POLYCARBONATE - POPULAR SIZES
- Twin Wall Polycarbonate Sheets - Clear, Opal & Bronze
- Triple Wall Polycarbonate Sheets - Clear Opal & Bronze
- Multi Wall Polycarbonate Sheets - Clear, Opal & Bronze
- Glazing Bars & Accessories
- ROOFING POLYCARBONATE - CUT TO SIZE
- Cut-To-Size Twinwall Polycarbonate Sheets
- Cut-To-Size Triplewall Polycarbonate Sheets
- Cut-To-Size Multiwall Polycarbonate Sheets
- Glazing Bars & Accessories
- EZ Glaze Polycarbonate Roof Sheets
- EZ Glaze Polycarbonate Corrugated Roof Sheet
- EZ Glaze Accessories
- CORRUGATED ROOFING SHEET
- Clear Corrugated Roofing Sheets
- Bitumen Corrugated Roofing Sheet & Accessories
-
-
Exterior Cladding
-
- UPVC EXTERIOR SHIPLAP CLADDING
- White Shiplap Cladding
- Foiled White UPVC Shiplap Cladding
- Black Ash Shiplap Cladding
- Anthracite Shiplap Cladding
- Dark Grey UPVC Shiplap Cladding
- Slate Grey UPVC Shiplap Cladding
- Rosewood Shiplap Cladding
- Golden Oak Shiplap Cladding
- Irish Oak UPVC Shiplap Cladding
- Chartwell Green UPVC Shiplap Cladding
- Rustic Green UPVC Shiplap Cladding
- Cream UPVC Shiplap Cladding
- Red UPVC Shiplap Cladding
- Blue UPVC Shiplap Cladding
-
-
Gutter & Drainage
-
- ROUND GUTTERING
- FloPlast Black Round Gutter
- FloPlast White Round Gutter
- FloPlast Anthracite Round Gutter
- FloPlast Brown Round Gutter
- FloPlast Light Grey Round Gutter
- SQUARE GUTTERING
- FloPlast Black Square Gutter
- FloPlast White Square Gutter
- FloPlast Anthracite Square Gutter
- Floplast Brown Square Gutter
- OGEE GUTTERING
- FloPlast Black Ogee Gutter
- Floplast White Ogee Gutter
- FloPlast Anthracite Ogee Gutter
- FloPlast Brown Ogee Gutter
- DEEPFLOW GUTTERING
- FloPlast Black Deepflow Gutter
- FloPlast White Deepflow Gutter
- FloPlast Anthracite Deepflow Gutter
- FloPlast Brown Deepflow Gutter
- FloPlast Light Grey Deepflow Gutter
-
- PVC & Laminated Skirting Board
-
Interior Cladding & Flooring
-
- Hygienic Wall Cladding
- White Hygienic Wall Cladding
- Pastel Hygienic Wall Cladding
- Gloss Hygienic Wall Cladding
- Hygienic Ceiling Cladding
- Hygienic Wall Cladding Adhesive
- Hygienic Wall Cladding Samples
- PVC BATHROOM & SHOWER CLADDING
- Large PVC Bathroom & Shower Wall Panels
- Large PVC Bathroom & Shower Wall Panel Trims & Adhesive
- 250mm Bathroom & Shower Wall Panels
- 250mm Bathroom & Shower Wall Panel Trims & Adhesive
- Decorative PVC Ceiling Cladding
- Perform Panel - Laminate Shower & Bathroom Wall Panels
- Perform Panel - Origins Collection
- Perform Panel - Elegance Collection
- Perform Panel - Harmony Collection
- Perform Panel - Tile Collection
- Perform Panel - Wood Slatted Collection
- Perform Panel - Trims & Adhesive
-
-
Window Sills
-
Outdoor Living
-
- OUTDOOR LIVING & GARDEN BUILDING
- Door Canopies - Polycarbonate & Aluminium
- Greenhouses - Polycarbonate & Aluminium
- Sunrooms - Polycarbonate & Aluminium
- Conservatories - Polycarbonate & Aluminium
- Garden Offices - Polycarbonate & Aluminium
- Carports - Polycarbonate & Aluminium
- Garden Sheds - Polycarbonate & Aluminium
- Gazebos - Polycarbonate & Aluminium
- Patio Covers - Polycarbonate & Aluminium
- Pool Enclosures - Polycarbonate & Aluminium
-
- Adhesive, Sealants & Fixings
- Composite Doors
FREE DELIVERY OVER £150 ON SELECTED ITEMS |
PREMIUM QUALITY PRODUCTS We stock ONLY high quality plastics |
UNBEATABLE SUPPORT Our customer support is second to none |
OVER 200 UK BRANCHES 200+ Branches delivery or Click & Collect |
Welcome to Building Plastics Online your No.1 Choice for High Quality Building Plastics in the UK
MENU
- Colormax Freefoam Fascia & Soffit
- FASCIA BOARD
- UPVC SOFFIT BOARD
- EASY VERGE
- ROOFING POLYCARBONATE - POPULAR SIZES
- ROOFING POLYCARBONATE - CUT TO SIZE
- EZ GLAZE POLYCARBONATE ROOF SHEETS
- CORRUGATED ROOFING SHEET
- SOLID POLYCARBONATE SHEET
- EVOLUTION CANOPY SYSTEM
- Britmet Slate Roof Tiles
- UPVC EXTERIOR SHIPLAP CLADDING
- Embossed 300mm Double Shiplap
- PVC Tudor Board
- XTRA FLO GUTTERING
- ROUND GUTTERING
- SQUARE GUTTERING
- OGEE GUTTERING
- DEEPFLOW GUTTERING
- FloPlast Black Cast Iron Gutter Round & Ogee
- TwinPlas Box Gutter
- Floplast Gutter Accessories
- FloPlast Soil Pipes & Fittings
- FloPlast Underground Drainage
- 100mm Torus Skirting Board
- 100mm Chamfered Skirting Board
- 150mm Torus Skirting Board
- 150mm Chamfered Skirting Board
- Door Architrave
- Slatted Acoustic Wall Panels
- Hygienic Wall Cladding
- PVC BATHROOM & SHOWER CLADDING
- Perform Panel - Laminate Shower & Bathroom Wall Panels
- SplashBax Acrylic & Di-Bond Shower Panels
- Wood & Stone Effect Flooring
- INTERNAL WINDOW SILLS
- Laminated Solid Replacement Window Board
- Bettaboard Laminated Internal Window Window Sills
- UPVC ARCHITRAVES & TRIMS
- COMPOSITE PLASTIC FENCING
- COMPOSITE DECKING
- OUTDOOR LIVING & GARDEN BUILDING
- Colormax Freefoam Soffit - Smooth
- Colormax Freefoam Fascia - Smooth
- White Fascia Board - Smooth
- White UPVC Fascia Board - Grained
- Black Ash Fascia Board - Grained
- Black UPVC Fascia Board - Smooth
- Agate Grey Fascia Board - Grained
- Anthracite Fascia Board - Grained
- Dark Grey UPVC Fascia Board - Smooth
- Slate Grey UPVC Fascia Board - Smooth
- Rosewood Fascia Board - Grained
- Golden Oak Fascia Board - Grained
- Irish Oak UPVC Fascia Board - Grained
- Chartwell Green Fascia Board - Grained
- Plain Grey UPVC Fascia Board
- Cream UPVC Fascia Board - Grained
- Rustic Green UPVC Fascia Board - Grained
- Royal Blue UPVC Fascia Board - Grained
- Red UPVC Fascia Board - Grained
- White Soffit Board - Smooth
- White UPVC Soffit Board - Grained
- Black Ash Soffit Board - Grained
- Black UPVC Soffit Board - Smooth
- Agate Grey Soffit Board - Grained
- Anthracite Soffit Board - Grained
- Anthracite UPVC Soffit Board - Smooth
- Dark Grey UPVC Soffit Board - Smooth
- Slate Grey UPVC Soffit Board - Smooth
- Rosewood Soffit Board - Grained
- Golden Oak Soffit Board - Grained
- Irish Oak UPVC Soffit Board - Grained
- Chartwell Green Soffit Board - Grained
- Rustic Green UPVC Soffit Board - Grained
- Cream UPVC Soffit Board - Grained
- Royal Blue UPVC Soffit Board - Grained
- Red UPVC Soffit Board - Grained
- Dry Verge Systems
- Eaves Protector, Bird Comb & Over Fascia Vent
- Twin Wall Polycarbonate Sheets - Clear, Opal & Bronze
- Triple Wall Polycarbonate Sheets - Clear Opal & Bronze
- Multi Wall Polycarbonate Sheets - Clear, Opal & Bronze
- Glazing Bars & Accessories
- Cut-To-Size Twinwall Polycarbonate Sheets
- Cut-To-Size Triplewall Polycarbonate Sheets
- Cut-To-Size Multiwall Polycarbonate Sheets
- Glazing Bars & Accessories
- EZ Glaze Polycarbonate Corrugated Roof Sheet
- EZ Glaze Accessories
- Clear Corrugated Roofing Sheets
- Bitumen Corrugated Roofing Sheet & Accessories
- Cut to Size Solid Polycarbonate Sheet
- Polycarbonate Greenhouse Glazing Panes
- EVOLUTION CANOPY SYSTEM
- Evolution Canopy System
- Britmet Slate Roof Tiles
- Britmet Slate Roof Tiles
- White Shiplap Cladding
- Foiled White UPVC Shiplap Cladding
- Black Ash Shiplap Cladding
- Plain Black UPVC Shiplap Cladding
- Anthracite Shiplap Cladding
- Dark Grey UPVC Shiplap Cladding
- Slate Grey UPVC Shiplap Cladding
- Plain Grey UPVC Shiplap Cladding
- Rosewood Shiplap Cladding
- Golden Oak Shiplap Cladding
- Irish Oak UPVC Shiplap Cladding
- Chartwell Green UPVC Shiplap Cladding
- Rustic Green UPVC Shiplap Cladding
- Cream UPVC Shiplap Cladding
- Red UPVC Shiplap Cladding
- Blue UPVC Shiplap Cladding
- Embossed 300mm Double Shiplap
- White Embossed 300mm Double Shiplap
- Cream Embossed 300mm Double Shiplap
- Sand Embossed 300mm Double Shiplap
- Light Grey Embossed 300mm Double Shiplap
- Dark Grey Embossed 300mm Double Shiplap
- PVC Tudor Board
- FloPlast Black Round Gutter & Fittings
- FloPlast White Round Gutter & Fittings
- FloPlast Anthracite Grey Round Gutter & Fittings
- FloPlast Brown Round Gutter & Fittings
- FloPlast Light Grey Round Gutter & Fittings
- FloPlast Black Square Gutter & Fittings
- FloPlast White Square Gutter & Fittings
- FloPlast Anthracite Grey Square Gutter & Fittings
- Floplast Brown Square Gutter & Fittings
- FloPlast Black Ogee Gutter & Fittings
- Floplast White Ogee Gutter & Fittings
- FloPlast Anthracite Grey Ogee Gutter & Fittings
- FloPlast Brown Ogee Gutter & Fittings
- FloPlast Black Deepflow Gutter & Fittings
- FloPlast White Deepflow Gutter & Fittings
- FloPlast Anthracite Deepflow Gutter & Fittings
- FloPlast Brown Deepflow Gutter & Fittings
- Floplast Cast Iron Gutter
- TwinPlas Box Gutter
- TwinPlas Box Gutter
- FloPlast Gutter Accessories
- FloPlast Soil Pipes & Fittings
- FloPlast Black Soil Pipe & Fittings
- FloPlast White Soil Pipe & Fittings
- FloPlast Grey Soil Pipe & Fittings
- FloPlast Underground Drainage
- FloPlast Underground Pipe
- FloPlast Underground Pipe Fittings
- FloPlast Underground Chambers & Gulleys
- FloPlast Underground Drainage Channel
- Acoustic Wall Panels
- White Hygienic Wall Cladding
- Pastel Hygienic Wall Cladding
- Gloss Hygienic Wall Cladding
- Hygienic Ceiling Cladding
- Hygienic Wall Cladding Adhesive
- Hygienic Wall Cladding Samples
- Large PVC Bathroom & Shower Wall Panels
- Large PVC Bathroom & Shower Wall Panel Trims & Adhesive
- 250mm Bathroom & Shower Wall Panels
- 250mm Bathroom & Shower Wall Panel Trims & Adhesive
- Decorative PVC Ceiling Cladding
- Perform Panel - Origins Collection
- Perform Panel - Elegance Collection
- Perform Panel - Harmony Collection
- Perform Panel - Tile Collection
- Perform Panel - Wood Slatted Collection
- Perform Panel - Trims & Adhesive
- SplashBax Acrylic & Di-Bond Shower Panels
- Wood and Stone Effect Flooring Planks
- Wood and Stone Effect Flooring Tiles
- UPVC White Window Board & Sill
- UPVC Black Ash Window Board & Sill
- UPVC Rosewood Window Board & Sill
- UPVC Golden Oak Window Board & Sill
- UPVC Anthracite Window Board & Sill
- Laminated Solid / Replacement Window Board
- Laminated Window Sill Accessories
- Bettaboard Laminated Internal Window Window Sills
- Bettaboard Laminated Internal Window Window Sills
- White PVC Trims
- Anthracite PVC Trims
- Dark Grey PVC Trims
- Black Ash PVC Trims
- GAP Chartwell Green PVC Trims
- Golden Oak PVC Trims
- GAP Irish Oak PVC Trims
- Rosewood PVC rims
- GAP Foiled White PVC Trims
- GAP Cream PVC Trims
- Eco Composite Fencing
- Composite Decking Boards
- OUTDOOR LIVING & GARDEN BUILDING
- Door Canopies - Polycarbonate & Aluminium
- Greenhouses - Polycarbonate & Aluminium
- Sunrooms - Polycarbonate & Aluminium
- Conservatories - Polycarbonate & Aluminium
- Garden Offices - Polycarbonate & Aluminium
- Carports - Polycarbonate & Aluminium
- Garden Sheds - Polycarbonate & Aluminium
- Gazebos - Polycarbonate & Aluminium
- Patio Covers - Polycarbonate & Aluminium
- Pool Enclosures - Polycarbonate & Aluminium
- Menu
-
Fascia & Soffit
-
- White Fascia Board - Smooth
- White UPVC Fascia Board - Grained
- Black Ash Fascia Board - Grained
- Black UPVC Fascia Board - Smooth
- Agate Grey Fascia Board - Grained
- Anthracite Fascia Board - Grained
- Dark Grey UPVC Fascia Board - Smooth
- Slate Grey UPVC Fascia Board - Smooth
- Rosewood Fascia Board - Grained
- Golden Oak Fascia Board - Grained
- Irish Oak UPVC Fascia Board - Grained
- Chartwell Green Fascia Board - Grained
- Plain Grey UPVC Fascia Board
- Cream UPVC Fascia Board - Grained
- Rustic Green UPVC Fascia Board - Grained
- Royal Blue UPVC Fascia Board - Grained
- Red UPVC Fascia Board - Grained
- White Soffit Board - Smooth
- White UPVC Soffit Board - Grained
- Black Ash Soffit Board - Grained
- Black UPVC Soffit Board - Smooth
- Agate Grey Soffit Board - Grained
- Anthracite Soffit Board - Grained
- Anthracite UPVC Soffit Board - Smooth
- Dark Grey UPVC Soffit Board - Smooth
- Slate Grey UPVC Soffit Board - Smooth
- Rosewood Soffit Board - Grained
- Golden Oak Soffit Board - Grained
- Irish Oak UPVC Soffit Board - Grained
- Chartwell Green Soffit Board - Grained
- Rustic Green UPVC Soffit Board - Grained
- Cream UPVC Soffit Board - Grained
- Royal Blue UPVC Soffit Board - Grained
- Red UPVC Soffit Board - Grained
-
-
Roofing Sheets
-
- Twin Wall Polycarbonate Sheets - Clear, Opal & Bronze
- Triple Wall Polycarbonate Sheets - Clear Opal & Bronze
- Multi Wall Polycarbonate Sheets - Clear, Opal & Bronze
- Glazing Bars & Accessories
-
-
Exterior Cladding
-
- White Shiplap Cladding
- Foiled White UPVC Shiplap Cladding
- Black Ash Shiplap Cladding
- Plain Black UPVC Shiplap Cladding
- Anthracite Shiplap Cladding
- Dark Grey UPVC Shiplap Cladding
- Slate Grey UPVC Shiplap Cladding
- Plain Grey UPVC Shiplap Cladding
- Rosewood Shiplap Cladding
- Golden Oak Shiplap Cladding
- Irish Oak UPVC Shiplap Cladding
- Chartwell Green UPVC Shiplap Cladding
- Rustic Green UPVC Shiplap Cladding
- Cream UPVC Shiplap Cladding
- Red UPVC Shiplap Cladding
- Blue UPVC Shiplap Cladding
-
-
GUTTER & DRAINAGE
-
- FloPlast Black Round Gutter & Fittings
- FloPlast White Round Gutter & Fittings
- FloPlast Anthracite Grey Round Gutter & Fittings
- FloPlast Brown Round Gutter & Fittings
- FloPlast Light Grey Round Gutter & Fittings
- FloPlast Black Square Gutter & Fittings
- FloPlast White Square Gutter & Fittings
- FloPlast Anthracite Grey Square Gutter & Fittings
- Floplast Brown Square Gutter & Fittings
- FloPlast Black Ogee Gutter & Fittings
- Floplast White Ogee Gutter & Fittings
- FloPlast Anthracite Grey Ogee Gutter & Fittings
- FloPlast Brown Ogee Gutter & Fittings
- FloPlast Black Deepflow Gutter & Fittings
- FloPlast White Deepflow Gutter & Fittings
- FloPlast Anthracite Deepflow Gutter & Fittings
- FloPlast Brown Deepflow Gutter & Fittings
- Floplast Cast Iron Gutter
-
-
PVC Skirting
-
Interior Cladding & Flooring
-
- White Hygienic Wall Cladding
- Pastel Hygienic Wall Cladding
- Gloss Hygienic Wall Cladding
- Hygienic Ceiling Cladding
- Hygienic Wall Cladding Adhesive
- Hygienic Wall Cladding Samples
- Large PVC Bathroom & Shower Wall Panels
- Large PVC Bathroom & Shower Wall Panel Trims & Adhesive
- 250mm Bathroom & Shower Wall Panels
- 250mm Bathroom & Shower Wall Panel Trims & Adhesive
- Decorative PVC Ceiling Cladding
-
-
Window Sills
-
Outdoor Living
-
- Door Canopies - Polycarbonate & Aluminium
- Greenhouses - Polycarbonate & Aluminium
- Sunrooms - Polycarbonate & Aluminium
- Conservatories - Polycarbonate & Aluminium
- Garden Offices - Polycarbonate & Aluminium
- Carports - Polycarbonate & Aluminium
- Garden Sheds - Polycarbonate & Aluminium
- Gazebos - Polycarbonate & Aluminium
- Patio Covers - Polycarbonate & Aluminium
- Pool Enclosures - Polycarbonate & Aluminium
-
- Adhesive, Sealants & Fixings
- Composite Doors
PREMIUM QUALITY PRODUCTS We stock ONLY high quality plastics |
UNBEATABLE SUPPORT Our customer support is second to none |
OVER 200 UK BRANCHES 200+ Branches nationwide, deliver or collection |
Mobile
PREMIUM QUALITY PRODUCTS We stock ONLY high quality plastics |
OVER 200 UK BRANCHES 200+ Branches nationwide, deliver or collection |
UNBEATABLE SUPPORT Our customer support is second to none |
reviews.io placeholder